Firewall Configuration: Windows Example
A computer firewall is a common component of the most popular operating systems that helps secure the computer by controlling incoming and outgoing network traffic.In Windows Firewall, there is a default block action to deny all inbound connections, so it is necessary to create inbound allow rules. During the installation progress of Audinate software, firewall configuration for Windows Firewall and macOS built-in firewall is automatically handled. However, for some reason, you may want to manually create rules.
Configuring Windows Firewall
The built-in firewall in Windows 10/ 11 is Windows Defender Firewall. To open the firewall, press Winkey + R, type WF.msc, and select OK.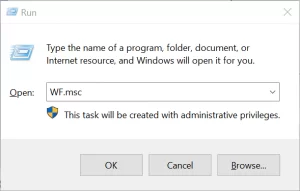

Understanding inbound and outbound
When we take a Windows PC as a reference, inbound traffic means network traffic that comes into your PC’s network adapter, goes through the firewall (if allowed), and ends up being captured by programs running on your system. Outbound traffic means the traffic going out to the network from your computer.For example, a simple Dante system contains two Dante-enabled devices, an AVIO adapter subscribed to a DVS running on a Windows 10 PC. When we take the Windows PC as referencing, the periodically time synchronization PTP packets sent from AVIO adapters are inbound traffic, while the audio flows from DVS to the AVIO adapter are outbound traffic.
Example: Add an inbound rule to allow PTP traffic
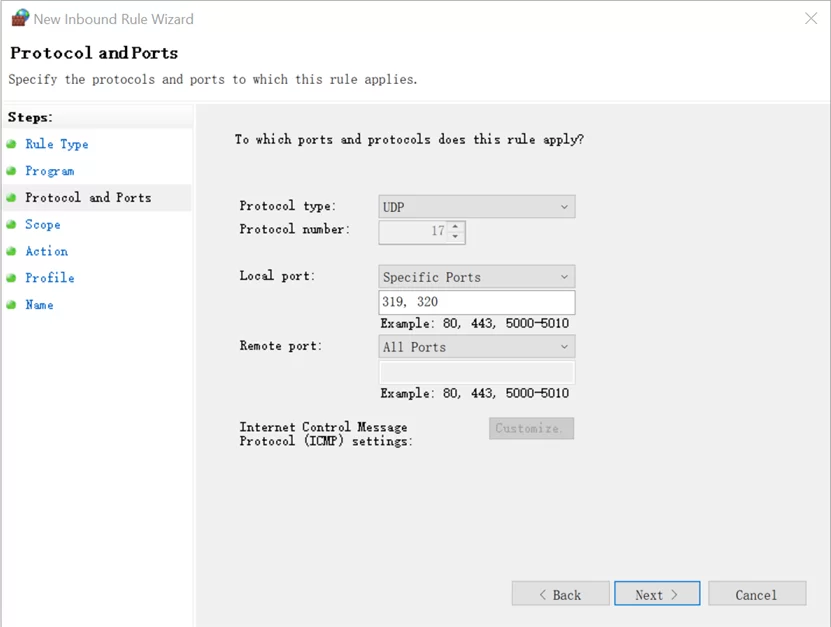
Dante devices are synchronized with one another over the network using the IEEE 1588 Precision Time Protocol (PTP), with traffic on 224.0.1.129 – 224.0.1.132 ports 319/ 320. This example creates an inbound rule to allow PC to receive PTP traffic.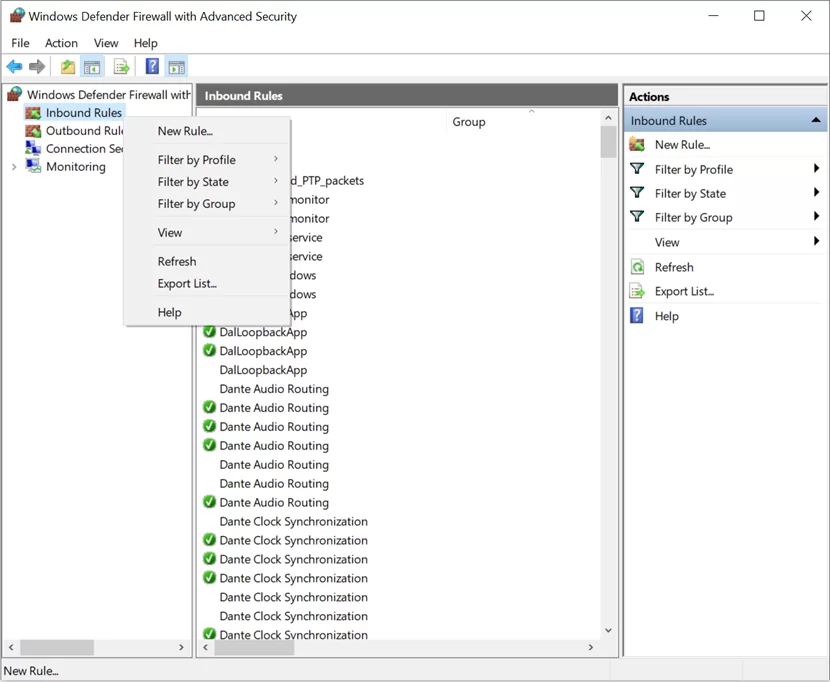
- Right-click Inbound Rules on the Console Tree and select New Rule.
- In the Inbound Rule Wizard that pops up, select Custom as the Rule Type, and then click Next.
- Select All Programs as the Program and click Next.
- PTP uses UDP as its transport protocol, so we select UDP as the Protocol type, reserve All Ports as Remote ports, select Specific Ports as the Local port, enter “319, 320” in the text field, and click Next.
- Reserve Any IP address as the remote IP address, select These IP addresses as local IP addresses, and click Add.
- Select This IP address range in the pop-up IP Address window.
- Enter 224.0.1.129 in the From text field,
- And 224.0.1.132 in the To text field, click OK and then click Next in the previous window.
- Select Allow the connection as Action, and click Next.
- If you want this rule to apply to each location, select the checkbox for Domain, Private and Public, and click Next.
- Specify the name for the rule, in this example, I use Allow_inbound_PTP_packets as the rule name and click Finish.
 Picture: Step 4
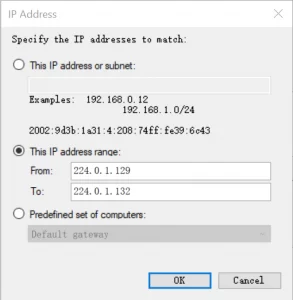 Picture: Step 5The Allow_inbound_PTP_packets rule is added to the Inbound Rules, and the PTP traffic on 224.0.1.129 – 224.0.1.132 ports 319/ 320 is allowed to come into the PC.Please keep in mind that with Windows Defender Firewall, allow rules take precedence over the default block actions, and an explicit block rule takes precedence over conflicting allow rules. This means that the allow rule you just created takes over the default block action, but if you have another rule denying inbound traffic on 224.0.1.129 – 224.0.1.132 ports 319/ 320, the PTP traffic will be blocked even though the allow inbound rule is activated.
Example: add an outbound rule to block audio flows
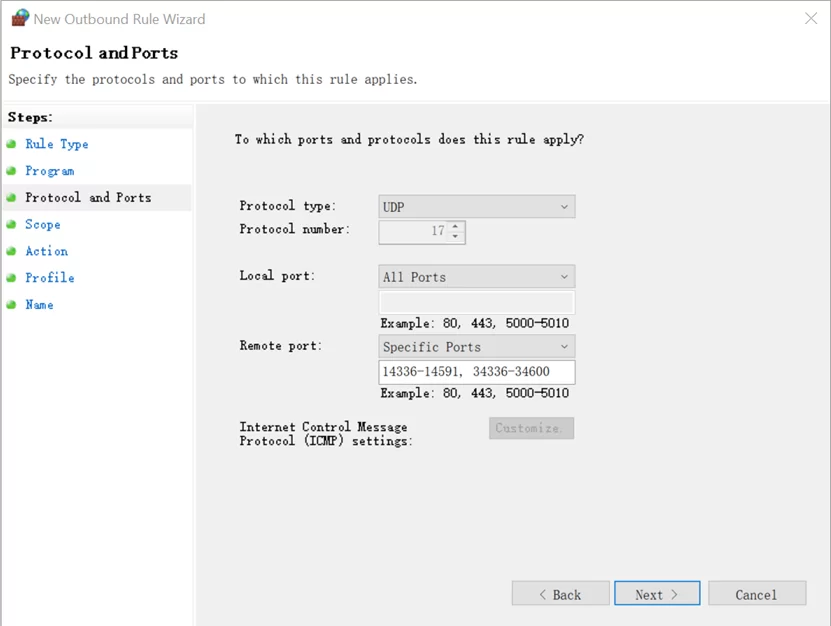
Dante packages audio into flows to save on network overhead. Unicast audio flow uses UDP as its transport protocol on ports 14336-14591 and 34336-34600. If you want to receive Dante audio, but for some reason prevent Dante audio flows from going out of your computer, this example creates an outbound rule to block the outgoing Dante audio traffic.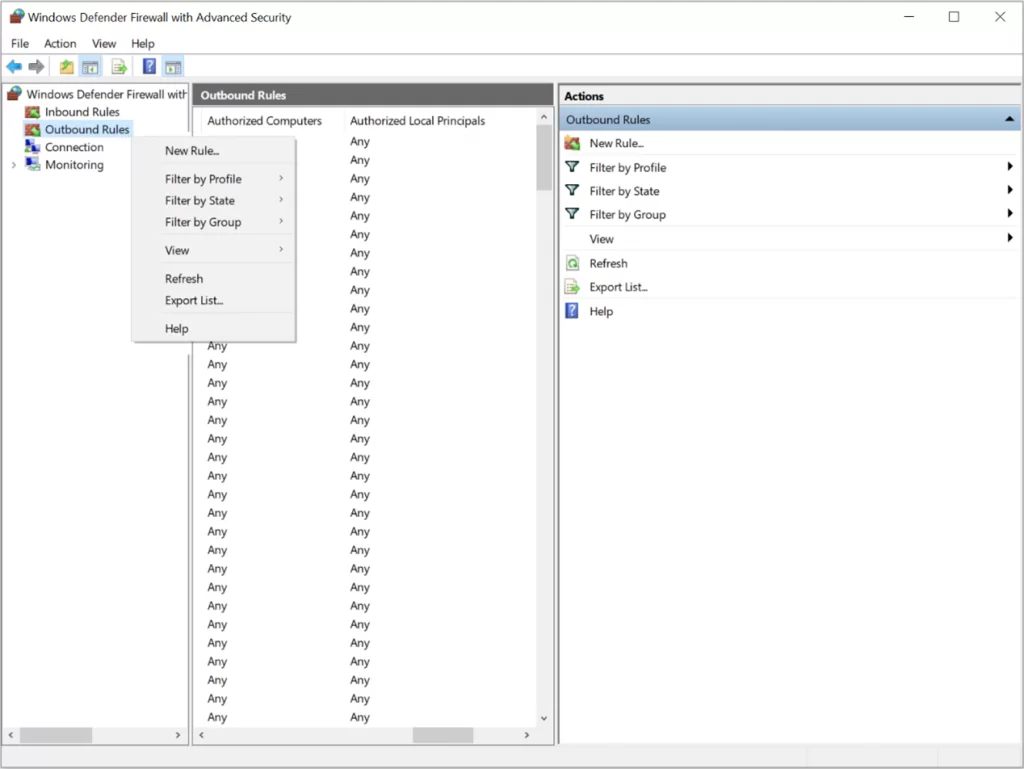
- Right-click Outbound Rules on the Console Tree and select New Rule.
- In the new Outbound Rule Wizard that pops up, select Custom as Rule Type, and click Next.
- Select All Programs as the Program and click Next.
- Select UDP as Protocol type, reserve All Ports as Local port, select Specific Ports as the Remote ports, enter “14336-14591, 34336-34600” in the text field, and click Next.
- Reserve Any IP address as both local and remote IP addresses and click Next.
- Select Block the connection as Action and click Next.
- If you want this rule to apply to each location, select the checkbox for Domain, Private and Public, and click Next.
- Specify the name of the rule, in this example, I use Deny_outbound_audio_packets as the rule name and click Finish.
 Picture: Step 4Now the Deny_outbound_audio_packets rule is added to the Outbound Rules, audio traffic on ports 14336-14591 and 34336-34600 are denied going out of your computer, while the incoming audio traffic is unaffected.